In Kubernetes, the ability to scale the infrastructure dynamically based on demand is a major benefit. It provides multiple layers of auto-scaling functionality: The Horizontal Pod Autoscaler and the Vertical Pod Autoscaler as pod-based, and the Cluster Autoscaler as node-based. However, configuring cluster auto-scaling using Kubernetes’ existing solutions may be challenging and restrictive. For example, in an AWS EKS cluster, it is not possible to manage nodes directly. Instead, we have to use additional orchestration mechanisms like node-groups.
Let’s assume that we have defined “t3.large” as the instance type of the node-group. When there is a need to provision a new node for the cluster, Kubernetes Cluster Autoscaler will create a new instance with the type “t3.large” regardless of the resource requests (in this case, “t3.medium” is sufficient). Even though we can use mix-type instances in node-groups, it might not always be feasible to fit the amount of resource needs and be cost-effective. So, what other option(s) do we have?

Karpenter is the answer!
Karpenter is an open-source, flexible, high-performance Kubernetes cluster autoscaler, announced by AWS in re:Invent 2021, designed to work with any Kubernetes cluster running in any environment. It helps launch automatically right-sized compute resources in response to a changing application load. Karpenter also provides just-in-time compute resources to meet your application’s needs and will soon automatically optimise a cluster’s compute resource footprint to reduce costs and improve performance.
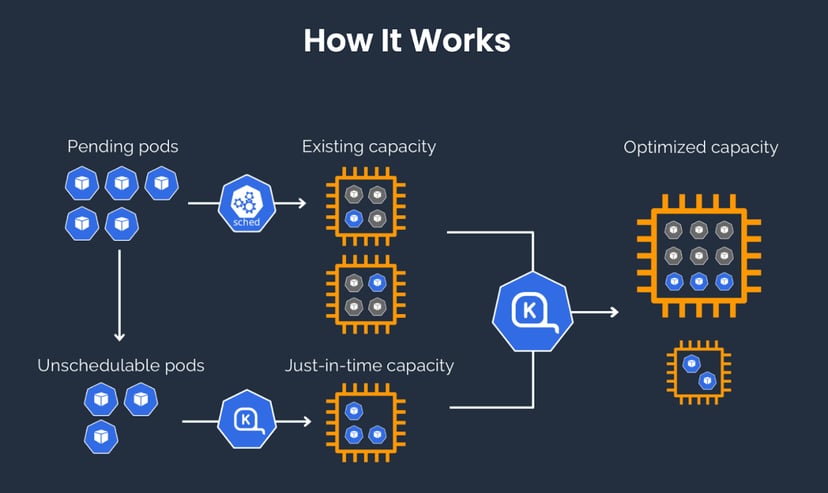
“Karpenter observes the aggregate resource requests of unscheduled pods and makes decisions to launch and terminate nodes to minimise scheduling latencies and infrastructure cost.”
(Source: https://karpenter.sh/)
Features
- Watching for pods that the Kubernetes scheduler has marked as unschedulable
- Evaluating scheduling constraints (resource requests, nodeselectors, affinities, tolerations, and topology spread constraints) requested by the pods
- Provisioning nodes that meet the requirements of the pods
- Scheduling the pods to run on the new nodes
- Removing the nodes when the nodes are no longer needed
Differences between Karpenter and Cluster Autoscaler
To have a better understanding, let’s have a look at the differences in an AWS environment.
Cluster Autoscaler watches the node groups through Amazon EC2 Auto Scaling Groups and will only scale up or down your managed node groups. Also, whenever there is a new node group, we have to tell Cluster Autoscaler about it. However, there are no node groups in Karpenter. It manages each instance directly enabling it to retry in milliseconds instead of minutes when capacity is unavailable. Karpenter also leverages various instance types, availability zones, and purchase options.
In the use of Cluster Autoscaler, pods are not bound to the nodes created. Instead, kube-scheduler makes the scheduling after the node becomes online. On the other hand, pods are bound immediately when Karpenter launches a node. It can start the container runtime and pre-pull the images. This can cut seconds down on node startup latency.
Let’s Get Our Hands Dirty!
Now, we will do a “quick start” using Karpenter in an Amazon EKS cluster.
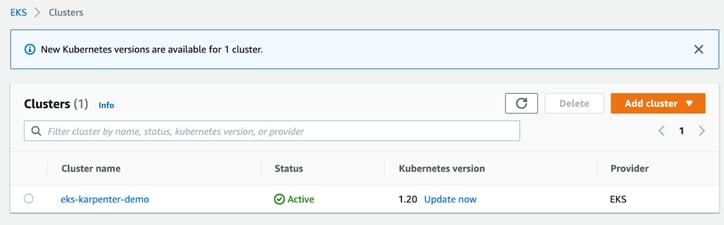
First, we will create an EKS cluster with a managed node group. This node group is used to run Karpenter within it. Karpenter itself can run anywhere, including on self-managed node groups, managed node groups or AWS Fargate. Let’s create a cluster.yaml file and apply:
cluster.yaml:
|
apiVersion: eksctl.io/v1alpha5 |
run:
|
eksctl create cluster -f cluster.yaml |
Also, we need to tag the subnets with the key kubernetes.io/cluster/eks-karpenter-demo so that Karpenter discovers them.
run:
|
SUBNET_IDS=$(aws cloudformation describe-stacks \ |
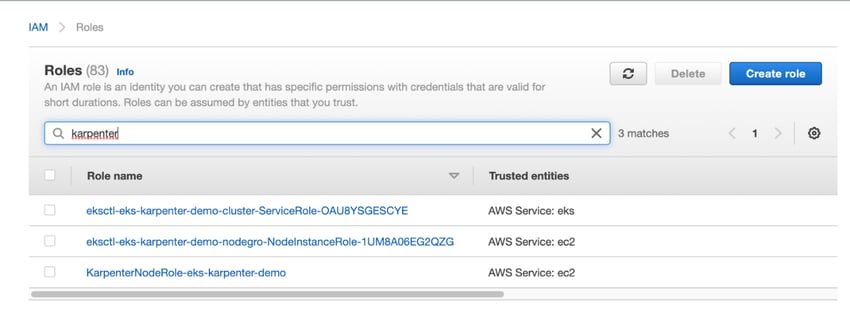
Next, we need to create an IAM role for the instances launched by Karpenter in order for them to run containers and configure networking. Karpenter discovers the InstanceProfile using the name KarpenterNodeRole-${ClusterName}. In our example, the cluster name is eks-karpenter-demo as you can see in the cluster.yaml file above. We can use the Karpenter’s CloudFormation template to create IAM resources.
run:
|
TEMPOUT=$(mktemp) |
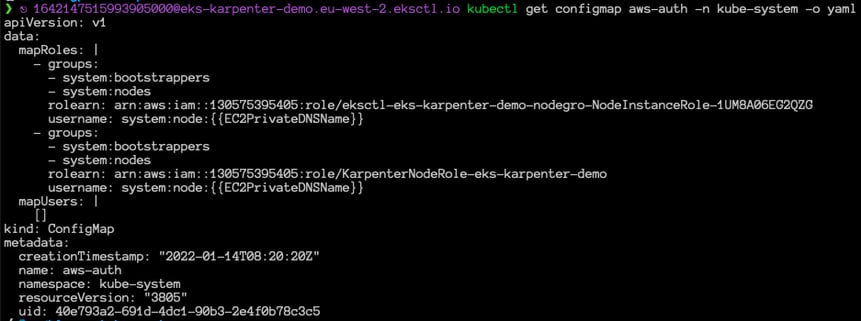
Then, we need to add the Karpenter node role to our aws-auth configmap so that the nodes with this role are allowed to connect to the cluster.
run:
|
eksctl create iamidentitymapping \ |
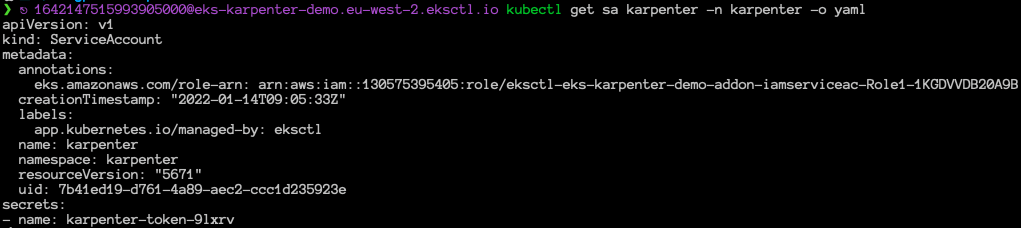
One last thing about IAM resources: we need to create an IAM role and a service account for KarpenterController which provides necessary permissions (like launching instances) to Karpenter. Then we will associate them using IRSA. (For the details about IRSA, you can read our blog post!)
run:
|
eksctl utils associate-iam-oidc-provider --region=eu-west-2 --cluster=eks-karpenter-demo --approve |
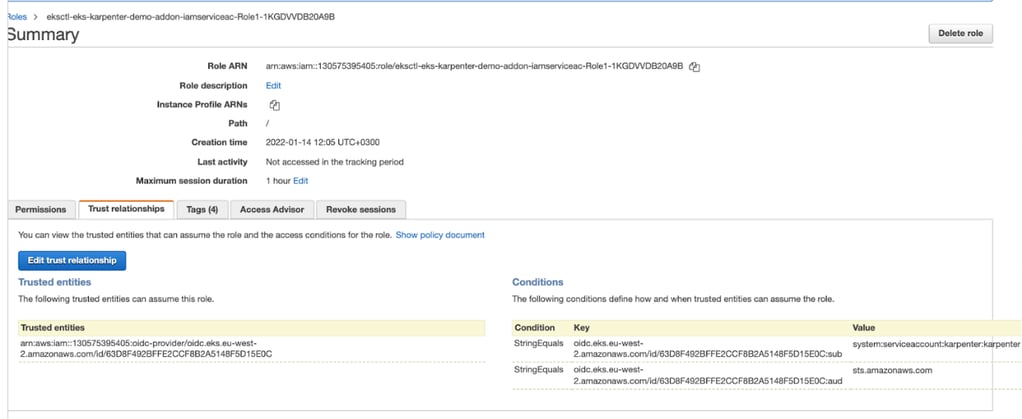
IAM role is created and is associated with the service account “karpenter” as you can see in the Conditions section under Trust relationships.
Now, we are ready to deploy Karpenter into the cluster using Helm chart.
run:
|
helm repo add karpenter https://charts.karpenter.sh helm repo update helm upgrade --install karpenter karpenter/karpenter --namespace karpenter \ |

To configure the behaviour of Karpenter in the cluster, we need to define the Karpenter provisioner configuration. We can create a default provisioner or a customized one. In the default configuration, Karpenter automatically discovers node properties such as instance types, zones, architectures, operating systems, and purchase types of instances. Let’s create a custom provisioner.
prosivioner.yaml:
|
apiVersion: karpenter.sh/v1alpha5 |
The ttlSecondsAfterEmpty value configures the amount of time after Karpenter will start terminating empty nodes.
run:
|
kubectl apply -f provisioner.yaml |
Karpenter is now ready to begin provisioning nodes in the cluster. Let’s create a deployment and scale, then check the Karpenter logs.
deployment.yaml:
|
apiVersion: apps/v1 |
run:
|
kubectl apply -f deployment.yaml kubectl scale deployment inflate --replicas 10 kubectl logs -f -n karpenter $(kubectl get pods -n karpenter -l karpenter=controller -o name) |

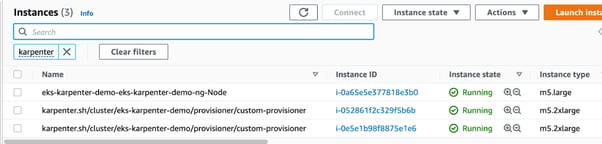
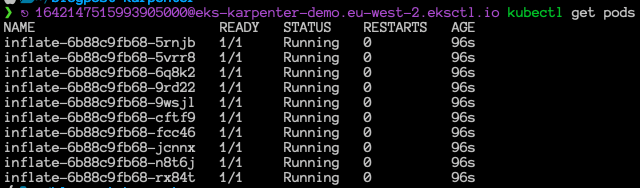
We can see that instances are launched and running. Also, the pods are scheduled. Now, let’s delete the deployment and check if the Karpenter terminates the empty nodes after 30 seconds.
run:
|
kubectl delete -f deployment.yaml |

Karpenter is a new approach to the auto-scaling concept in Kubernetes clusters. It’s essentially a native kubernetes workload scheduler which allows provisioning new nodes in response to unschedulable pods with the fitting compute resources to handle the cluster's applications.
Hope this post helps you learn a new approach to cluster autoscaling in your Kubernetes environments and consider the advantages compared to other auto scaling options.