Deploying applications can be complex and challenging, significantly as your projects grow in size and complexity. In DevOps, having a reliable and efficient deployment tool is crucial. One such tool that has gained popularity for its ease of use and powerful features is Octopus Deploy. In this blog post, we'll explore what Octopus Deploy is, its key features, and how you can create your first deployment using this powerful tool.
Understanding Octopus Deploy
What is Octopus Deploy?
Octopus Deploy is a continuous deployment automation and release management tool designed to simplify the deployment of applications and services. It provides a centralised platform for managing and automating the deployment process, allowing teams to deliver software more efficiently and reliably.
Key Features of Octopus Deploy:
1. Deployment Automation: Octopus Deploy automates the deployment process, ensuring consistency and reducing the likelihood of errors during the release process.
2. Multi-Environment Support: It supports deployments across different environments, allowing you to move seamlessly from development to testing, staging, and production.
3. Release Management: Octopus Deploy enables you to manage and track releases, making it easier to roll back to previous versions if issues arise.
4. Integration Capabilities: It integrates seamlessly with popular CI/CD tools, source control systems, and various platforms, allowing for a flexible and customisable deployment pipeline.
5. Configuration Management: Octopus Deploy facilitates the management of configuration settings for different environments, making it easier to maintain consistency across deployments.
How Octopus Deploy Compares to Other Deployment Automation Tools
| Tool | Strengths | Limitations | Best For |
|---|---|---|---|
| Octopus Deploy | Release orchestration, multi-env deployments, enterprise governance | Requires external CI for builds | Enterprise delivery automation |
| Argo CD | GitOps workflows, Kubernetes-native | Not ideal for traditional apps | Kubernetes-focused teams |
| GitHub Actions | Easy CI integration | Limited deployment governance | Small/medium teams |
| GitLab CI | Strong CI/CD combo | Less flexible release models | Teams already using GitLab |
Modern Deployment Strategies Supported by Octopus Deploy
- Rolling Deployments — Update instances gradually with no downtime
- Blue/Green Deployments — Switch traffic between two identical environments
- Canary Releases — Release to a small user subset before full rollout
- Progressive Delivery — Controlled, automated rollout based on health signals
- Shadow Deployments — Test new versions without affecting live traffic
Why Deployment Automation Is Critical for Enterprise Teams
- Reduce production incidents
- Ensure configuration consistency
- Improve release frequency
- Enforce security and compliance checks
- Support multi-environment deployments
- Integrate seamlessly with CI pipelines
Hands-On: Creating First Project
Creating First Project with Octopus Deploy
Prerequisites:
Before diving into the hands-on part, ensure you have the following:- Octopus Deploy instance set up (either on-premises or cloud-based).
- An application or service ready for deployment.
- Basic knowledge of your application's deployment requirements.
Step-by-Step Guide:
For the demonstration, we’ll follow along the following steps.
- Create a new Octopus Deploy Project
- Add Web Application to the Project
- Create a Deployment Process
- Finally, Deploy the application.
Creating Octopus Project
Let’s start creating our project named First Project by going to Projects and Clicking Add Project. Give a pretty name for your project - I’ll go on with the name First Project - then click Save.
Adding Packages and Preparing the Environment
As we mentioned, Octopus Deploy is a powerful Continuous Deployment (CD) tool. Although we can integrate many CI tools, we’ll use ready-to-use packages for this demonstration. You can find the files we plan to use in this demo from OctopusDeploy’s Official GitHub repository, which contains all the files, scripts, and variables needed.
Under the Resources/BuildArtifacts folder, we have a file named Trident.Web.1.2.3.zip, which we want to deploy via Octopus Deploy.
After downloading it, Let’s upload the package to the Octopus Deploy. Navigate to the Library and select Upload Package. Select the package you downloaded and choose Upload.

The next thing we need to prepare is the infrastructure. To do that, we first need to create Environments, which are groups of deployment targets or application hosts.
Navigate to the Infrastructure and select Environments. Select Add Environment to create a new environment and choose Save. For this demo, we will create three environments: Development, Test, and Production.
Creating Deployment Targets
The next thing we are going to create is Deployment Targets. For the sake of this demo, we’ll add Cloud Regions as a deployment target. So, If you want to follow along with the hands-on part of this blog post, you won’t need to create any machines/instances. Cloud regions are legacy targets that pre-dated workers as a mechanism to run scripts on cloud providers. They are used today to execute scripts multiple times with variables scoped for each iteration. It won’t do a deployment to Cloud Regions, but it’ll allow us to build up our Deployment Process.
To do that, Navigate to the Infrastructure and select Deployment Targets. Select Add Deployment Target to create a new deployment target. When You choose it, Octopus Deploy will ask you which type of Deployment Target you want to set up.
It’s important to note that Octopus Deploy supports various deployment targets from Windows and Linux application hosts to applications hosted in AWS or Azure or running on Kubernetes.
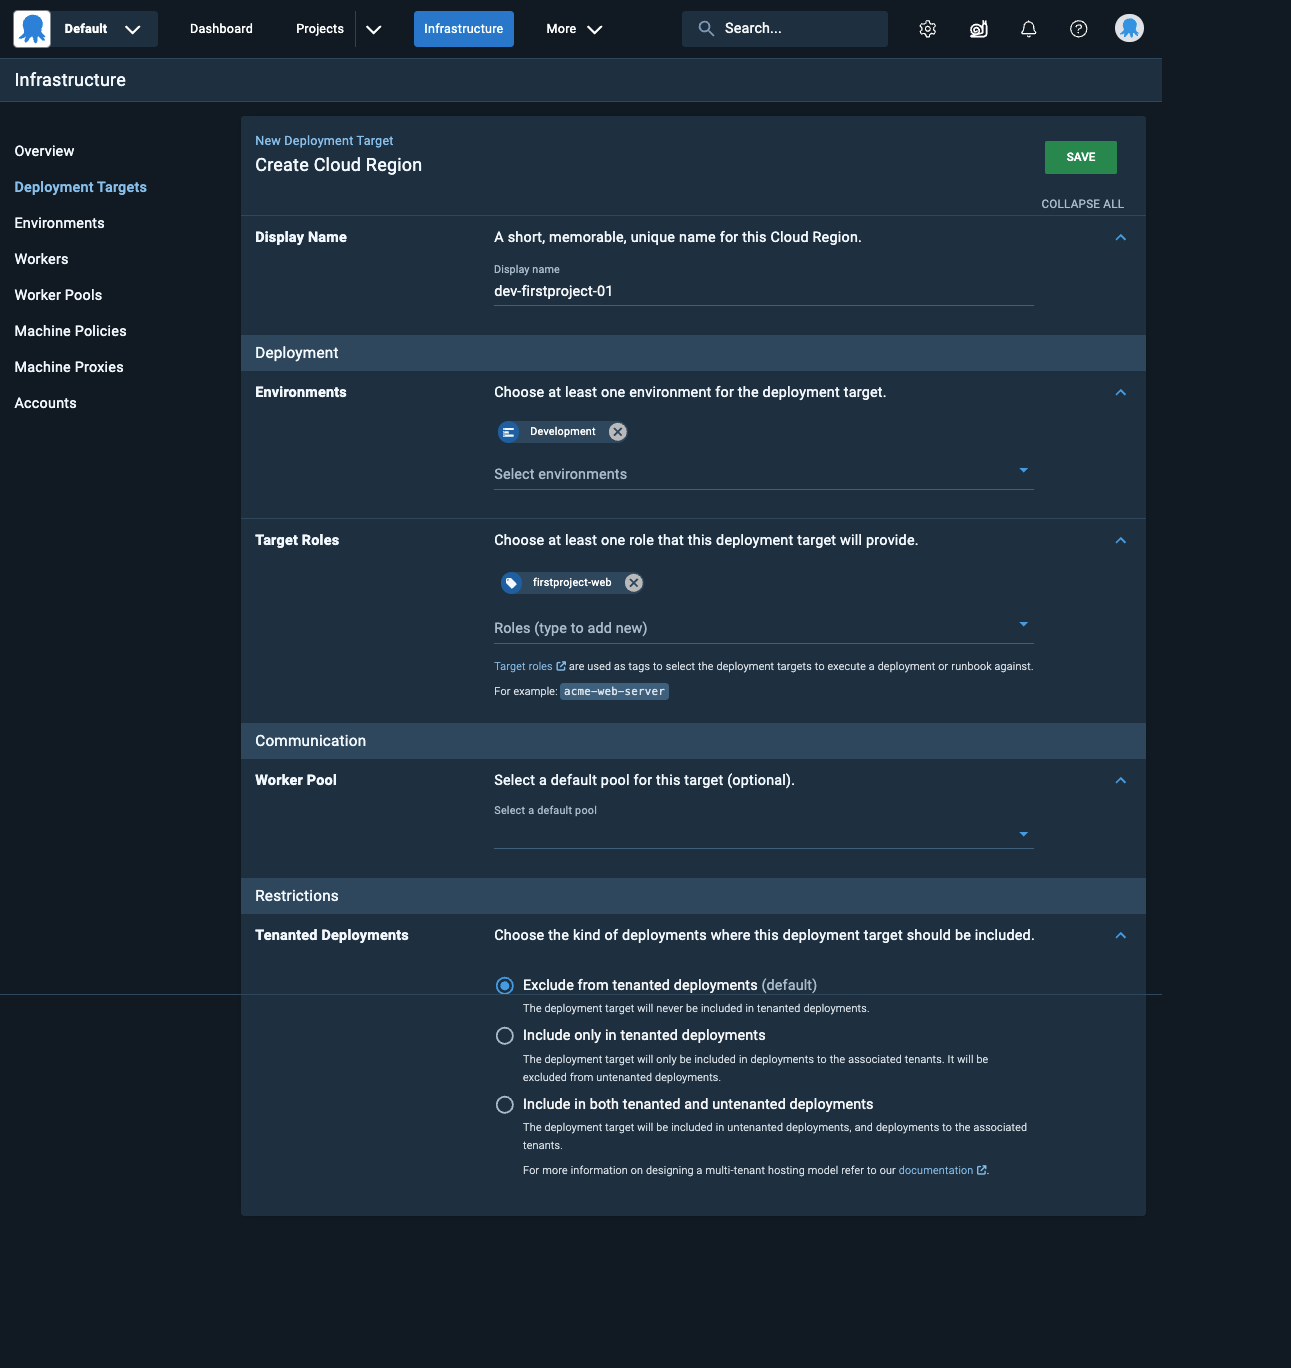
Let’s go ahead and select the Cloud Region and choose Add. Now, you will be presented with three options that will be the same for any deployment target you add. It’s going to be Display Name, Environment and Target Roles.

I’d like to go with the environment-projectName-numericalIDOfInstance naming convention for the Display Name. For the Environment, We already have three environments. You need to create a Target Role - you can create it just by typing a name you want - And, The target role is crucial - I’ll explain it briefly.
For this demo, we’ll create 5 Deployment Targets. 1 for the Development environment, 2 for the Test environment and 2 for Production environments. Here is the list of all Deployment Targets.
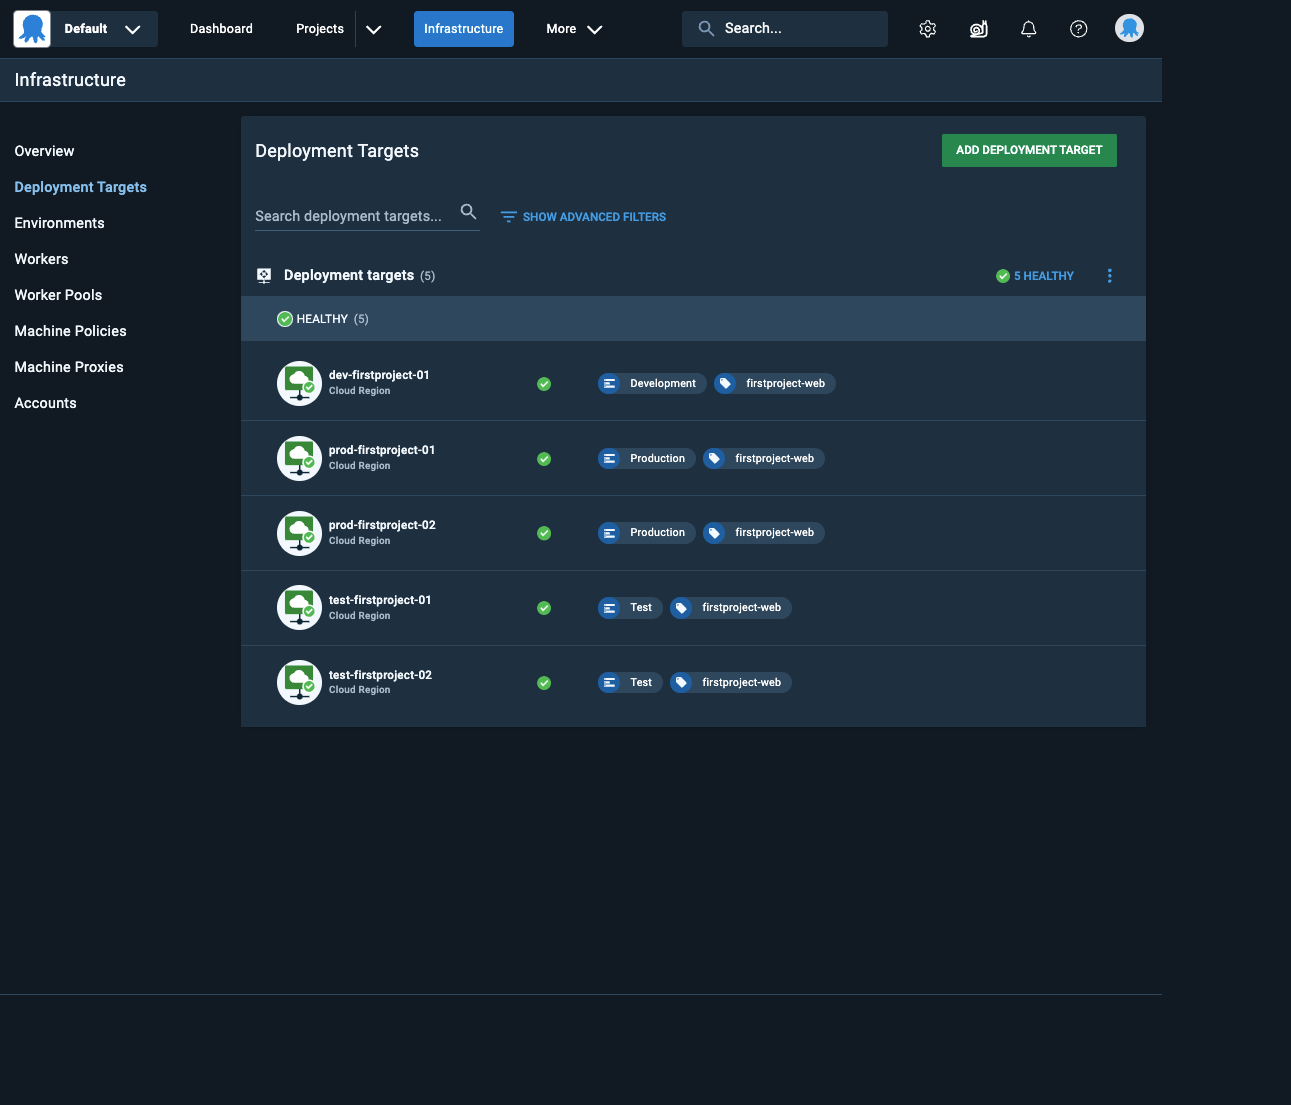
Pay attention to the role we selected for all Deployment Targets. The Role is what the deployment process will target, which will make sense in just a few minutes as we build out the Deployment Process.
The Deployment Process isn’t going to target a specific machine. We’re not going to be targeting the dev-firstproject-01 machine. Instead, what we do is refer to the Role. So, Octopus Deploy will find all the machines that match the Role and will be deployed to a specific environment.
Now, we’ve created Environments and added all of the Deployment Targets. We’re ready to proceed.
Creating Deployment Process
Now, we can create a Deployment Process. Navigate to the Projects and find the project we created - the First Project in our case - You'll see Process on your left-hand menu. You can click Create Process to create the Deployment Process we plan to use.

To create a Deployment Process, you can select Installed Step Templates (currently available in over 54 them) or Community Steps (presently available in over 500 them).
Since we want to make a deployment for a package, we’ll select the Package, select Deploy a Package step, and continue.
Give it the name “Deploy Trident Web Application”; for the “On Targets in Roles” section, select the Role we created while creating the deployment targets. The next thing we should choose is the package. Scroll to the Package section and select the PackageID as the Trident.Web package which we uploaded at the beginning. Click Save to persist our changes.
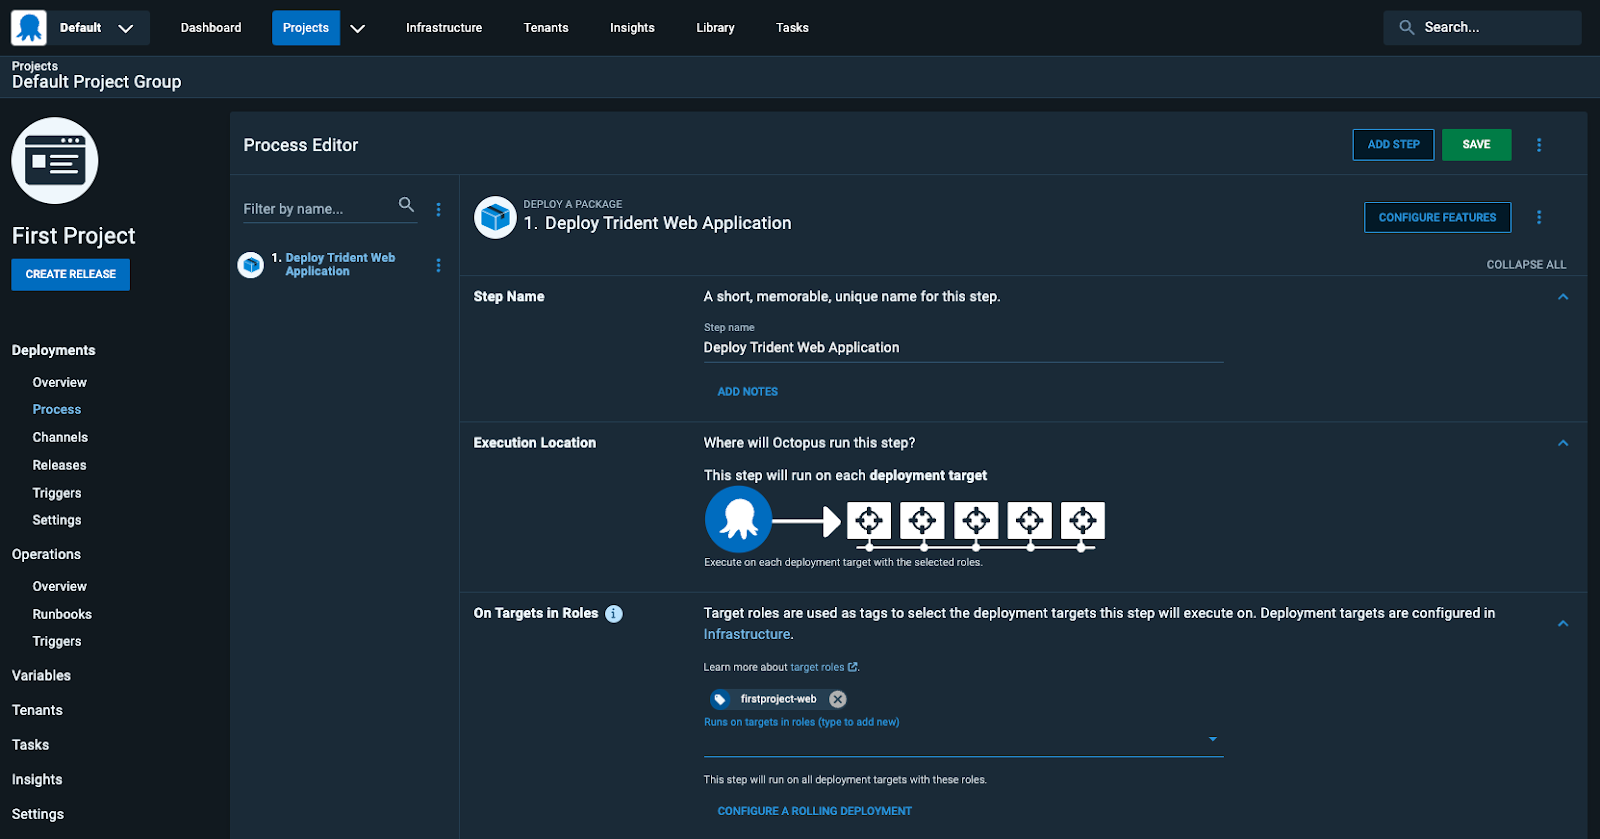
At this point, Our deployment process is ready.
Create and Deploy Release
Now, We can create a release representing a specific version of our application. This release ties together the project, environments and Deployment Process. You just need to click Create Release to create and Save a new release.
Everything is ready to make a deployment. Just select Deploy to create a deployment to the Development environment.

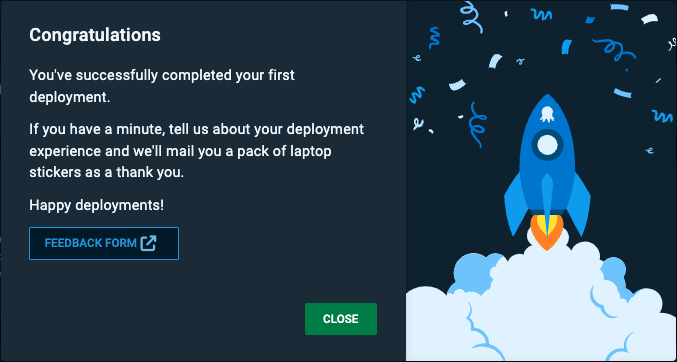
Once the deployment is successful, celebrate your achievement! Octopus Deploy has helped you streamline your deployment process and deliver software more efficiently.
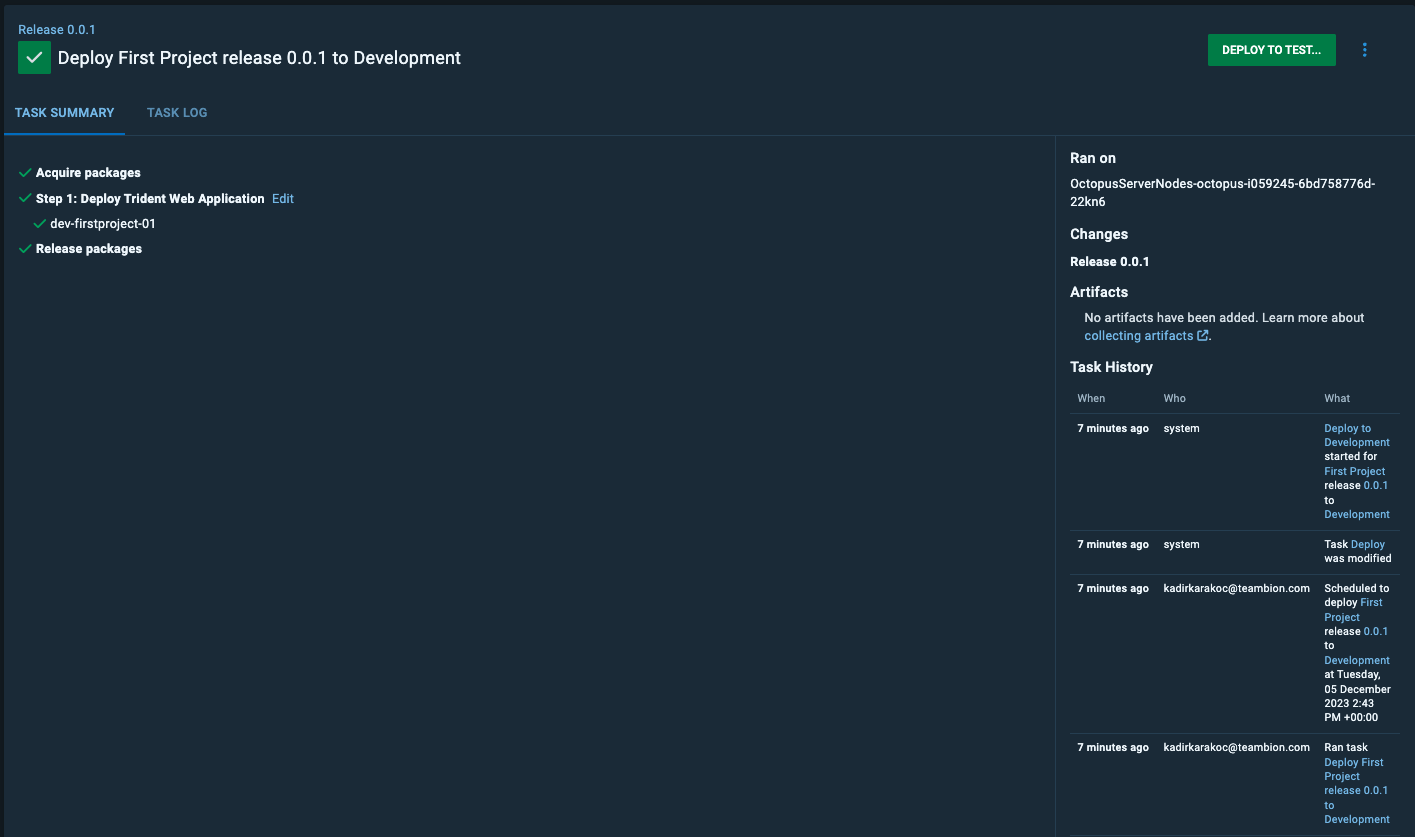
There are a couple of things to point out. We have the Task Summary, which displays all of the steps in our Deployment Process. There is also the Task History section on the bottom right-hand corner of the screen, which will show us the deployment status, including who scheduled it and when it was scheduled.
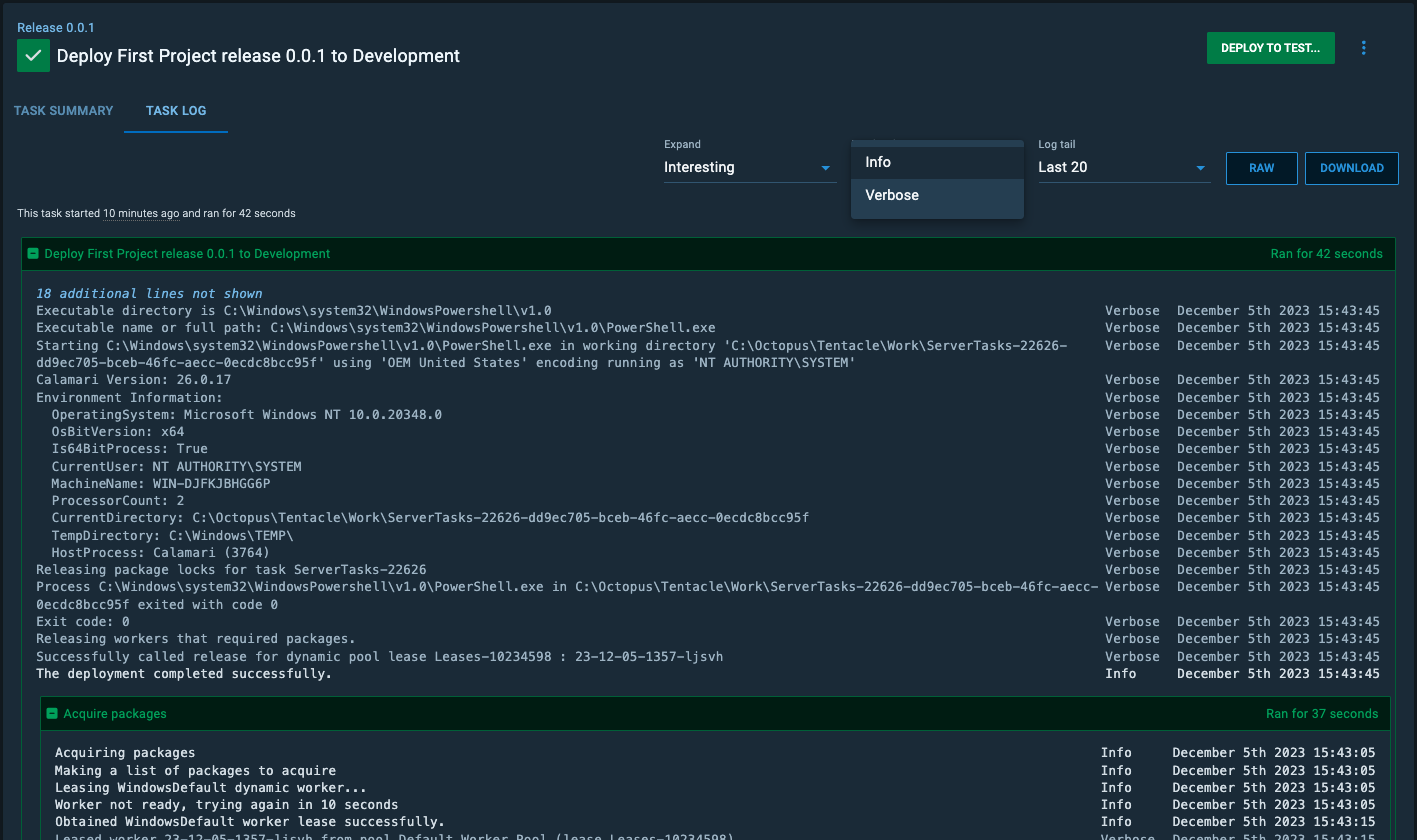
Here, I also want to mention that there is a Task Log tab, which is quite helpful for reading the logs related to the process. It has the functionality to show the process logs according to the Log Level you want. In this way, If you need more information about the error/process, You can use Verbose level.
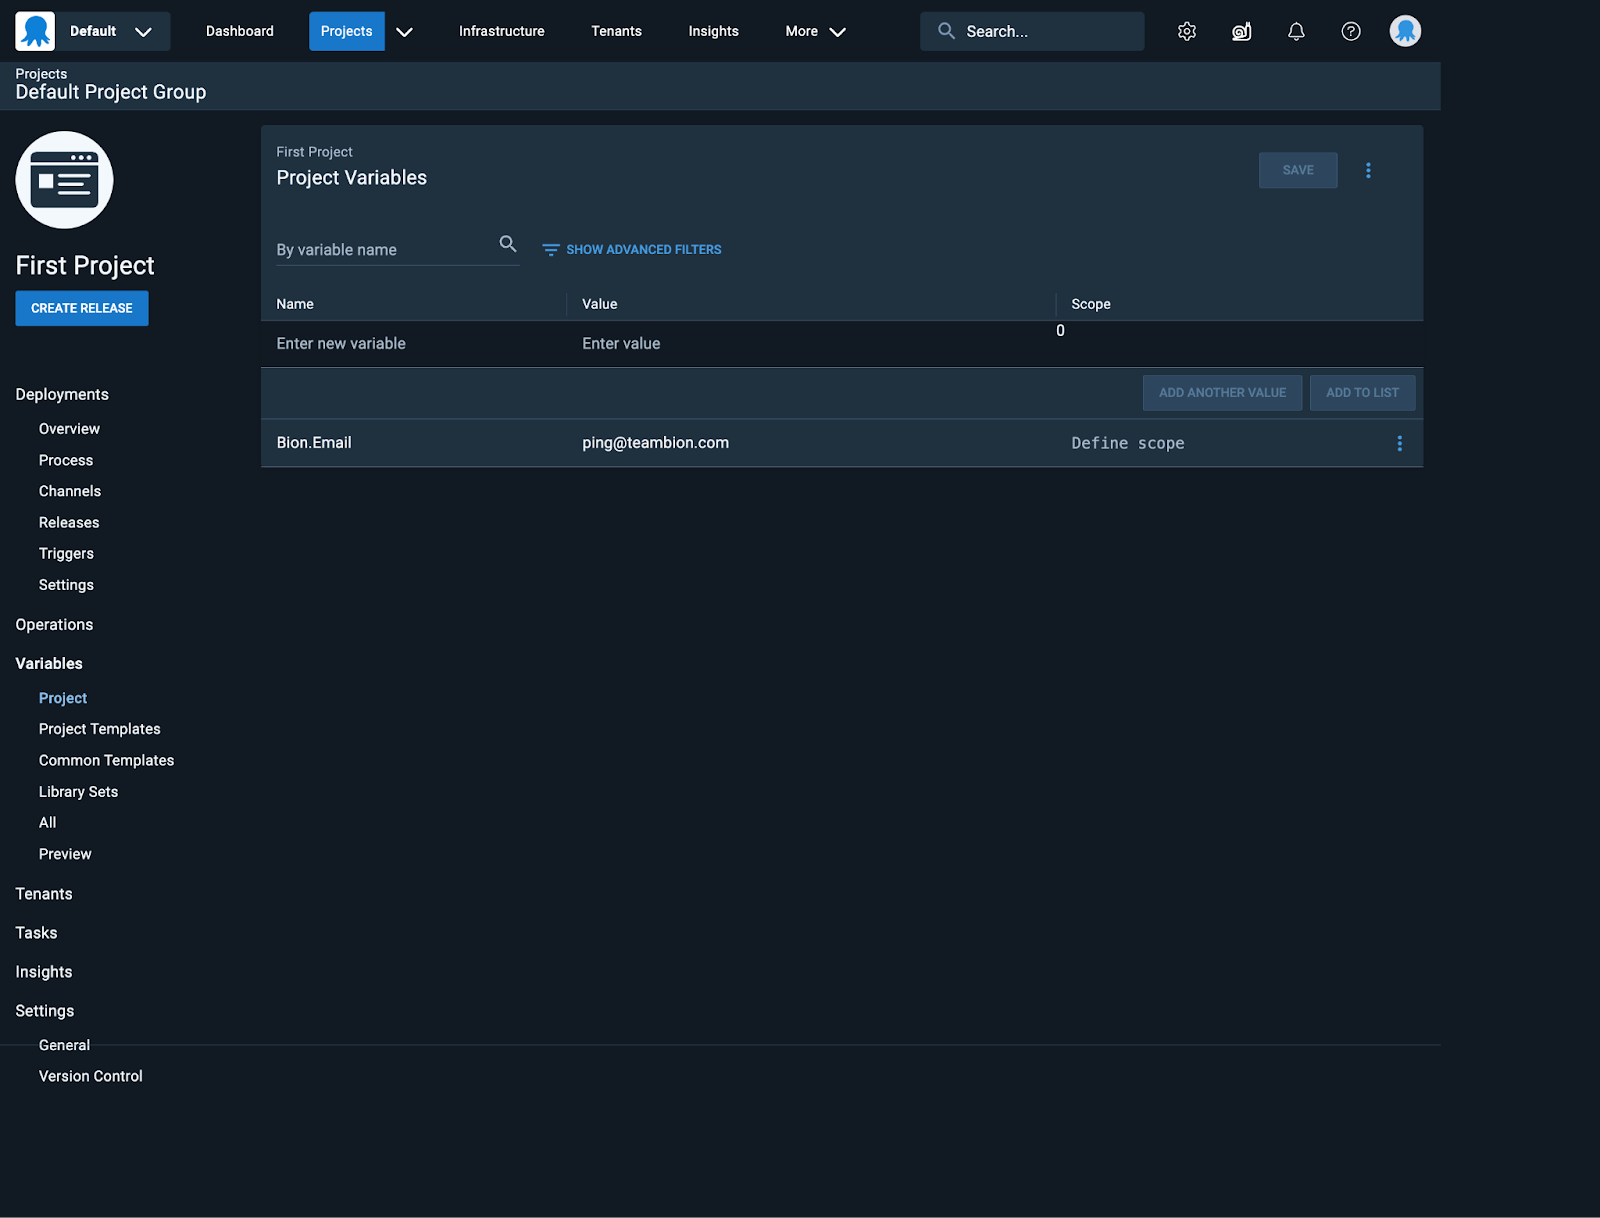
Let's enrich our Deployment Process more. Let’s create a Variable to use inside our Deployment Process. Navigate to the Variables section on your left-hand side and create a new variable called Bion.Email and with value ping@teambion.com.
Let’s navigate to the Process again and add a Run a Script step to our Deployment Process.
For the Run a Script Step, Octopus Deploy supports many different languages such as Powershell, Bash, C#, F# or Python3. It allows us to adapt and create an inline script for easy use.
For the sake of the demonstration, we’ll use a simple inline script to see the behaviour of the process. After giving your step a name, use the Powershell inline script while creating the Run a Script step.

After saving it, you must create a new release with the latest changes to deploy your latest changes in the Process. It is another good feature of Octopus Deploy. We can ensure that our changes won't affect the current release. Every time you make changes, You must create a new Release.
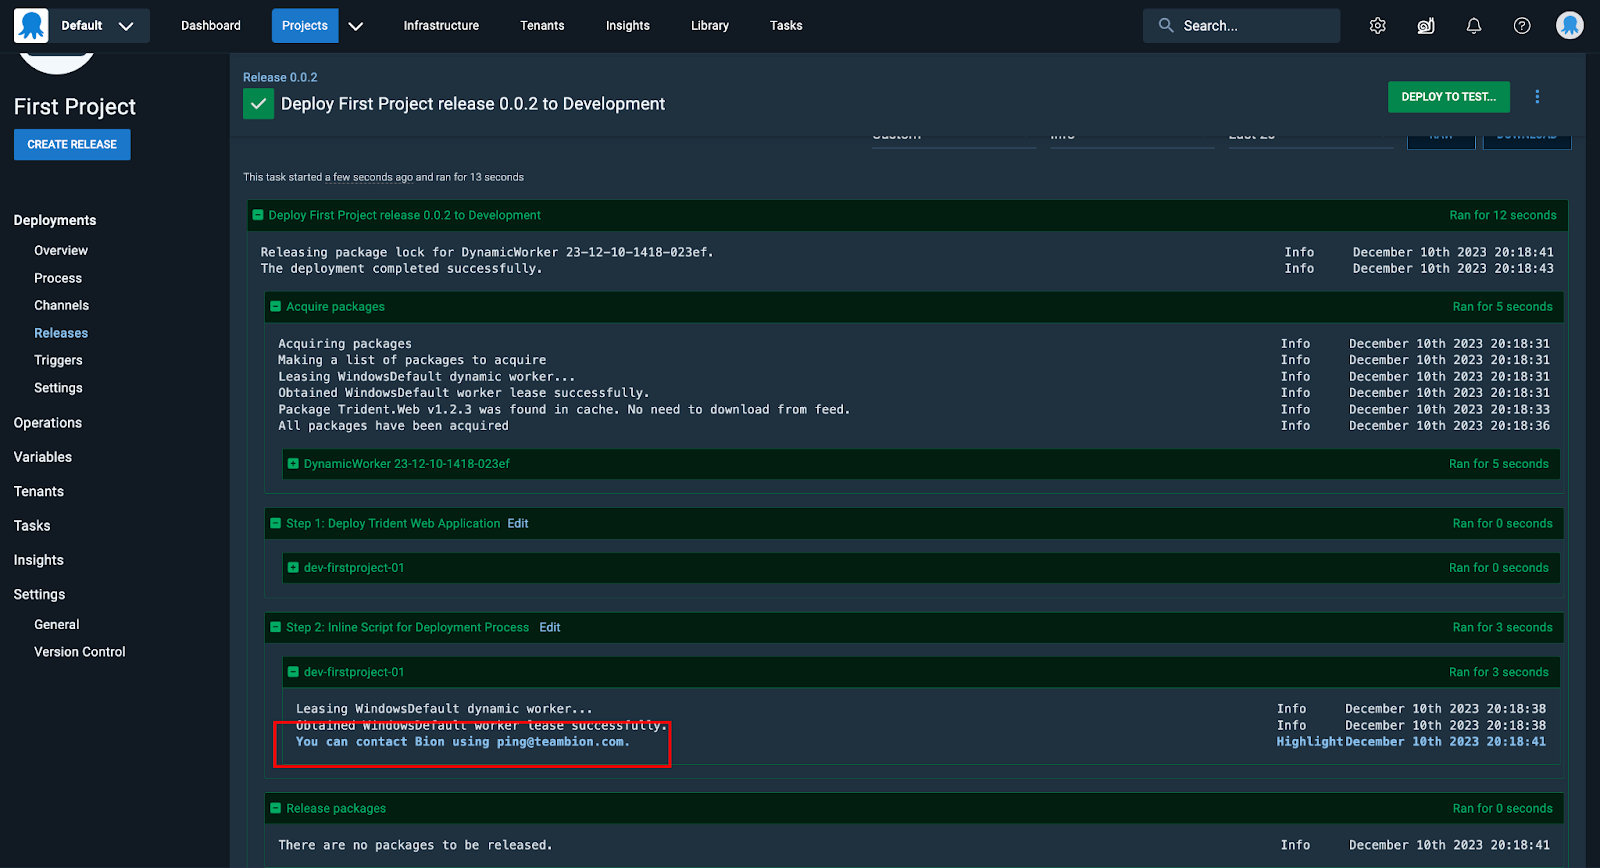
After deployment is successful, you can check the logs. As you can see from the screenshot above, We accomplished it.
Common Deployment Challenges and How Octopus Solves Them
- Environment Drift — Octopus ensures environments stay in sync through declarative configuration
- Inconsistent Releases — Packages and versions are centrally managed
- Manual Approval Bottlenecks — Built-in approval and auditing workflows remove friction
- Multi-environment pipelines — Structured progression (Dev → Test → Prod) reduces risk
- Secrets & configuration sprawl — Secure variable management prevents exposure
Conclusion:
Next Steps